How to Horizontally Scale WebSocket Servers Using RabbitMQ.
About
Why do we need this? Say we have a chat app that connects to a WebSocket server. The websocket connection is stateful, i.e the server needs to remember which clients are subscribed to which topics. If we want to scale this app horizontally across multiple server instances, we need a way for those instances to share topic membership and publish messages to each other.
Example: Alice connects to Node 1 and subscribes to sports. Bob connects to Node 2 and also subscribes to sports. If Alice publishes a message to sports, how does that message get to Bob if they are connected to different server nodes?
Solution: We use RabbitMQ as the message broker. On server start, the server connects to RabbitMQ and creates a unique queue for that node in RabbitMQ. When a client subscribes to a topic ( or a room ) on that node, the server binds its queue to that topic. When a message is published to a topic, RabbitMQ fans it out to every server node that has its queue bound to the topic. Each server node then forwards the message only to its own local clients for that topic.
This way we can run multiple instances of this WebSocket server, and ensure all the clients receive the messages regardless of which node they are connected to.
Architecture Explanation
Server Behavior
| Behavior | Detail |
|---|---|
| On connect | New clients automatically join the lobby topic |
| Subscriptions | Clients can join or leave topics anytime |
| State | Each node only tracks its own connected clients |
| Plain text messages | Automatically sent to the lobby topic |
| Cross-node messaging | Nodes share messages through RabbitMQ only |
RabbitMQ Delivery Model
Each node owns one exclusive RabbitMQ queue. Topic bindings on that queue are added and removed dynamically as local clients subscribe and unsubscribe.
Server startup: When a node starts, it connects to RabbitMQ and creates a unique, exclusive queue for itself. This queue serves as the node's message inbox for all topics its clients are subscribed to.
Client joins a topic (binding process): When a client subscribes to a topic on a node, the server immediately binds that node's queue to the topic's routing key in RabbitMQ. This tells RabbitMQ to start routing messages with that topic to this node's queue. If multiple clients on the same node subscribe to the same topic, the binding only happens once (the binding is already in place).
Message flow (client publish → all subscribers):
- Client sends a
publishaction to its connected node. - That node publishes once to the RabbitMQ topic exchange.
- RabbitMQ copies the message to every node queue bound to that topic.
- Each node consumes from its own queue and forwards the message to its local subscribers.
Why bindings are dynamic — topic sports example:
Node 2 only binds its queue to sports while Bob (a local client) is subscribed. When Bob unsubscribes, Node 2 removes the binding to stop wasting broker resources:
State 1: Both nodes have subscribers
  Node 1 queue ← sports
  Node 2 queue ← sports

State 2: Bob unsubscribes (Node 2's only sports subscriber)
  Node 1 queue ← sports
  Node 2 queue ← (removed: no local subscribers)
After unbinding, new sports publishes only go to Node 1's queue.
State Layout
The server maintains two complementary data structures in memory:
| Structure | Location | Purpose |
|---|---|---|
topicSubscribers |
On the server | Map: topic → all local WebSocket clients subscribed to it |
ws.subscriptions |
On each client connection | Set: all topics that client has joined |
Why two structures? One answers "who's subscribed to topic X?" and the other answers "what topics is client Y in?"
Example state after Alice (Node 1) and Bob (Node 2) both subscribe to sports:
// Server-level maps
node1.topicSubscribers = { lobby: Set(wsAlice), sports: Set(wsAlice) }
node2.topicSubscribers = { lobby: Set(wsBob),   sports: Set(wsBob)   }

// Per-connection sets ( inside the server )
wsAlice.subscriptions = Set('lobby', 'sports')
wsBob.subscriptions   = Set('lobby', 'sports')

// RabbitMQ queue bindings
node1Queue → ['lobby', 'sports']
node2Queue → ['lobby', 'sports']
Message Protocol
The server accepts two types of client messages:
1. Simple messaging — Plain text messages are automatically published to the lobby topic and delivered to all connected clients.
2. Topic-based messaging — Send JSON messages to join/leave topics or broadcast to a specific audience:
| Action | Purpose | Example |
|---|---|---|
subscribe |
Join a topic to receive all messages sent to it | { "action": "subscribe", "topic": "sports" } |
unsubscribe |
Leave a topic and stop receiving its messages | { "action": "unsubscribe", "topic": "sports" } |
publish |
Send a message to a specific topic | { "action": "publish", "topic": "sports", "message": "Hello room" } |
list |
Get all topics you're currently subscribed to | { "action": "list" } |
Example Topic Flow
This example shows the same topic named sports, but with the two clients connected to different WebSocket nodes. The local WebSocket nodes do not talk to each other directly. RabbitMQ is the bridge between them.
sequenceDiagram
        box Node 1
            participant A as Client A (Alice)
            participant S1 as WebSocket Node 1
        end

        participant MQ as RabbitMQ Topic Exchange

        box Node 2
            participant S2 as WebSocket Node 2
            participant B as Client B (Bob)
        end

        A->>S1: Connect with ?name=Alice
        S1-->>A: Welcome, Alice!
        S1-->>A: System: Subscribed to "lobby"

        B->>S2: Connect with ?name=Bob
        S2-->>B: Welcome, Bob!
        S2-->>B: System: Subscribed to "lobby"

        A->>S1: { action: "subscribe", topic: "sports" }
        S1->>MQ: Bind Node 1 queue to routing key sports
        S1-->>A: System: Subscribed to "sports"

        B->>S2: { action: "subscribe", topic: "sports" }
        S2->>MQ: Bind Node 2 queue to routing key sports
        S2-->>B: System: Subscribed to "sports"

        A->>S1: { action: "publish", topic: "sports", message: "Hello" }
        S1->>MQ: Publish message with routing key sports
        MQ-->>S1: Deliver to Node 1 queue
        MQ-->>S2: Deliver to Node 2 queue
        S1-->>A: [sports] Alice: Hello
        S2-->>B: [sports] Alice: Hello

        B->>S2: { action: "unsubscribe", topic: "sports" }
        S2->>MQ: Unbind sports if Bob was last local subscriber
        S2-->>B: System: Unsubscribed from "sports"

        A->>S1: { action: "publish", topic: "sports", message: "Still there?" }
        S1->>MQ: Publish message with routing key sports
        MQ-->>S1: Deliver to Node 1 queue
        S1-->>A: [sports] Alice: Still there?
left to right flow:
- Each node keeps only its own local client connections.
- Each node binds its RabbitMQ queue to a topic only when that node has at least one local subscriber for that topic.
- Publishing goes to RabbitMQ once.
- RabbitMQ fans the message out to every node queue currently bound to that topic.
- Each node then sends the message only to its own connected clients for that topic.
Testing
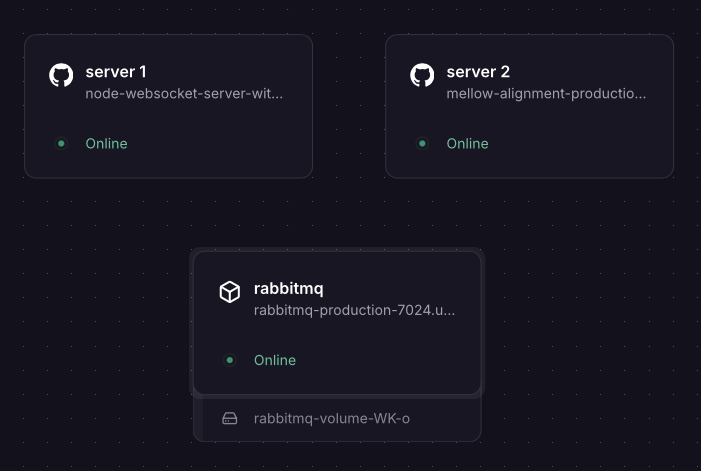
To test cross-node messaging, you need at least two server instances connected to the same RabbitMQ instance. The steps below use Railway to deploy them, but any hosting provider works.
1. Deploy RabbitMQ
- Go to Railway dashboard → New Project → Deploy from Docker Image
- Enter image:
rabbitmq:3-management - Set environment variables:
RABBITMQ_DEFAULT_USER=adminRABBITMQ_DEFAULT_PASS=strongpasswordRABBITMQ_DEFAULT_VHOST=/(allows multiple apps to coexist)- (Optional) For the management UI, create a public URL in Settings → Network and expose port
15672 - Add a volume at
/var/lib/rabbitmqfor data persistence: - On the dashboard, create a new volume
- Select the RabbitMQ instance
- Add the path
/var/lib/rabbitmqand deploy
2. Deploy Server Instances
For each server instance (repeat steps for Server 1 and Server 2):
- Create a new service → Deploy from Git (select this repo)
- Railway auto-detects the Dockerfile and builds the image
- In Settings → Network, create a public URL (you'll need this for client testing)
- In Variables, add:
RABBITMQ_URL=amqp://admin:strongpassword@rabbitmq.railway.internal:5672- (Replace hostname with your RabbitMQ internal URL if different, you can find this in the RabbitMQ service's network settings)
- Deploy the service
Repeat the same steps and create a second server instance to test multi-node messaging. After these steps, you should have two WebSocket server instances running, with their own public URLs, both connected to the same RabbitMQ instance.
3. Test with the Browser Client
A full browser client is included in index.html in the repository. Serve it locally using Python (python3 -m http.server) or Node (npx http-server), then open http://localhost:8000 in your browser.
- Enter the public URL of Server 1 (e.g.,
wss://your-server-1-url.railway.app), enter your name, and click Join - Open a second tab, connect to Server 2's public URL with a different name, and click Join
- Subscribe to the same topic (e.g.,
sports) in both tabs - Send a message from one tab — it will appear in the other, proving cross-node communication works
- Unsubscribe from the topic in one tab and verify new messages stop arriving there
Check server logs to verify that RabbitMQ is routing messages and that topic bindings are dynamically added/removed as clients subscribe/unsubscribe.